Jinling Exploration
Cultivation progress for roughly ten minutes of effort!

Night Exploration of the Imperial City is a new solo PvE mode where you can farm cultivation perfusion pills. Once you reach a certain floor, you will start receiving weekly reward bags with pills that speed up your cultivation.
This game mode has seemingly endless amount of floors, and every floor, the mobs deal more damage, and become harder to defeat.
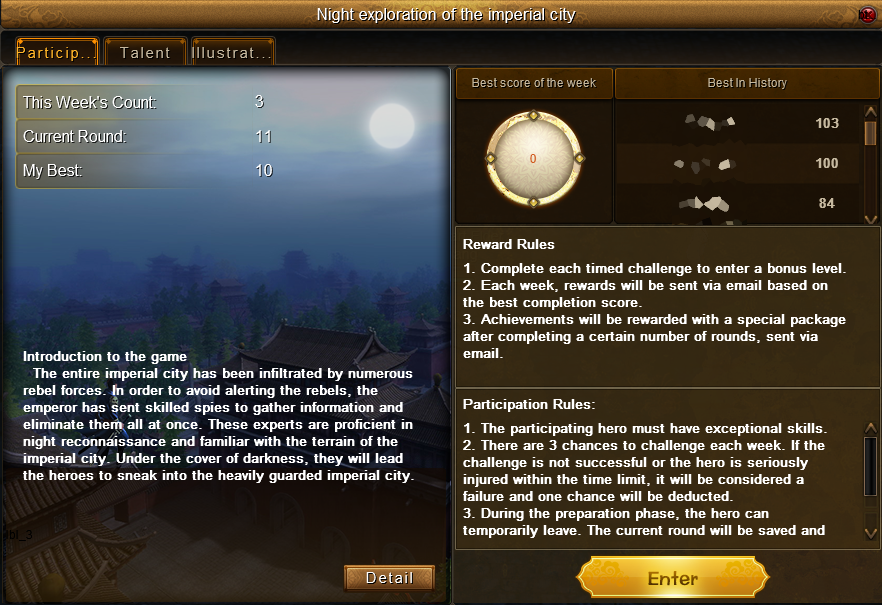
You can find this PvE mode at the bottom left of your screen. "My Battle" -> "Night exploration of the imperial city". This new mode does not require VIP.
In this guide, I will explain the various game mechanics of this game mode.
1. Weekly Rewards
Every week, if you successfully finish a floor, you will be eligible for weekly rewards (distributed on Mondays). The game will start sending you pills, once you reach floor 5.
The floors do not reset every week. If you reach floor 5, then the next week, you resume from floor 5. This way, you can slowly build up your progress. However, if you die, your progress resets back to floor 0. You're allowed to skip a run for a week, it still does not reset your progress.
Once you finish floor 15, you will receive the maximum amount of 35 (for 350000) cultivation perfusion pills. By spending about 10 minutes for a floor, you can save 35 hours of leveling per week. It's a worthwhile investment.
Hover your mouse over the white circle to see what reward you'll get for that week. If the number says 0, it means you still need to finish a floor for the week.
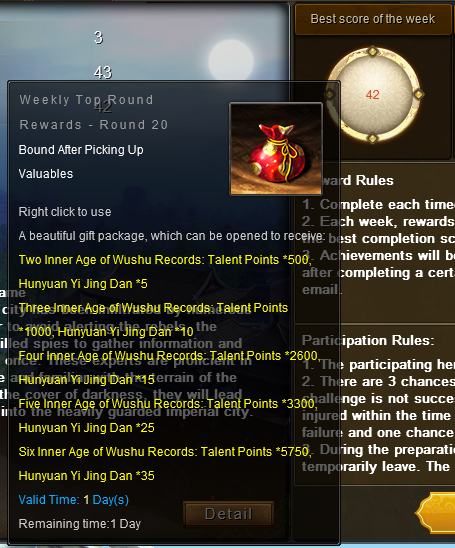
In this example, you can see the player is eligible for the maximum possible reward of floor 20, despite the player finishing floor 42.
2. Rounds
Each floor contains 5 rounds, each round being its own minigame.
Round 1: Kill everything
The objective is simple. Kill every single mob you come across.
Round 2: Open crates
In this round, you have to open two crates, both surrounded by mobs. In a lot of cases you will draw aggro of these mobs, so you'll have to kill them first anyway. You can easily find the crates by looking for the mobs on your minimap.
Round 3: Protect bonfire
In this round, you need to light a bonfire, then protect it for 60 seconds.
First, there will be three mobs. Two of them will be together, and one will be alone. Kill the mob that is alone, and loot the torch. Make sure that you have 1 slot in your task inventory to do this. Go to the bonfire, select it, then right click the torch to light the bonfire.
Now, two guards will spawn every 10 seconds or so. You have to draw them away from the bonfire circle. If they enter the circle, the bonfire timer stops ticking. Once the bonfire timer reaches 0, you win.
Round 4: Save concubine
In this round, you have to find a kidnap sack, release the trapped concubine, then escort them back to the spawn portal. This round has 5 possible spawn points. See the map below for details.
Once you find the concubine, she will start walking towards the portal. On her way to the portal, on three occasions, mysterious killer NPCs will spawn, threatening her. However, she actually can't die. She will simply stay in place, until you kill those killer NPCs.
Once she reaches the blue portal, you finish the round.
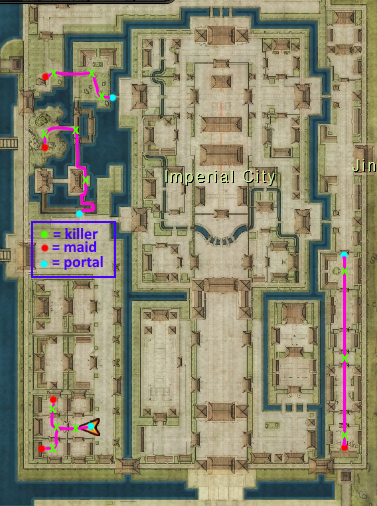
Just hope that you don't get the bottom-right spawn.
Round 5: Kill boss
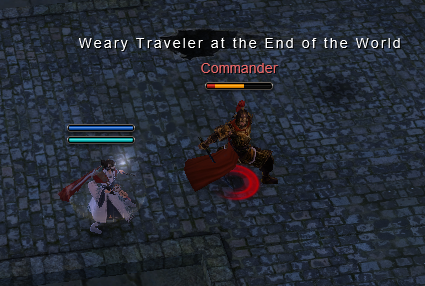
In this round, you have to kill 4 guardian NPCs to spawn the final boss of the floor. Once the final boss spawns, you kill it. It's easy to parry his single target attacks. Avoid his AOE attacks as well.
At higher level floors, the most threatening skill of the final boss is Rocks Piercing the Sky. In some cases, he can one-shot you, even through parry, because he crits really hard. You can goose dodge this attack with good timing. If you're unsure, you can also swap to the Beast Villa inner to get a feel for the skill. Or hope that your wristguard is off cooldown.
3. Talent Points
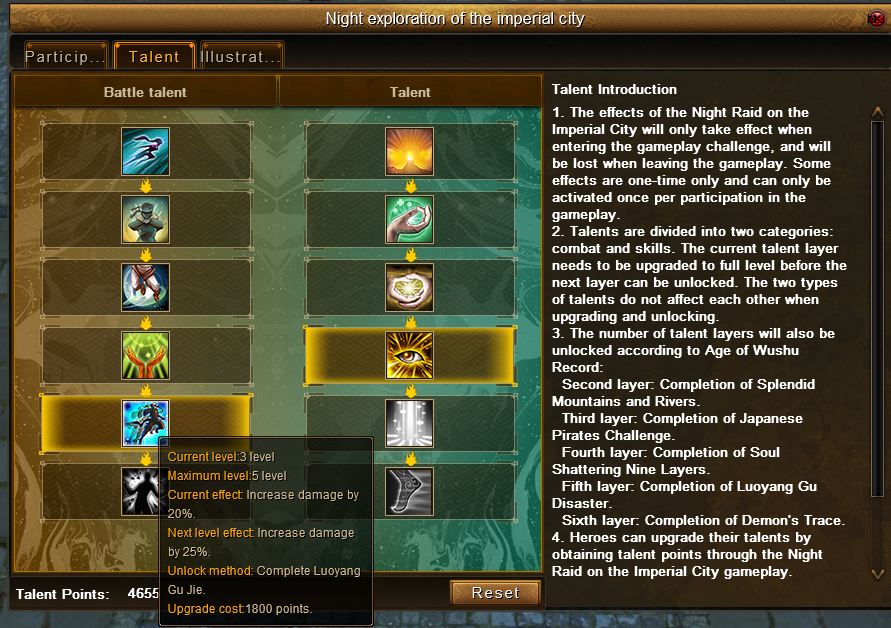
The game mode introduces a new shop that you can use to make the runs easier, by buffing your character. You can use Talent Points to unlock these buffs. The best way to earn talent points is simply to reach higher floors to earn more points from the weekly reward bag. It'll take about a month or two, to unlock all buffs this way.
4. Buffs
To make the game mode easier, after every round you finish, you have the option to pick a buff. It's best to pick buffs suitable for your playstyle. If you play external sets, pick external buffs. The buffs have tiers, and the higher the tier, the better the effect. The highest tier is jade; A green diamond will be shown with the buff, when making a selection.
However, quite a few of the buffs are bugged. The weapon buffs barely function, and certain buffs for some reason give a huge passive damage boost on top of their active effect. These buggy buffs will never be fixed, not even in the Chinese version.
In the table below, you can see what the buffs say and what they actually do.
Buff | Expected effect (Jade) | Actual effect (Jade) |
|---|---|---|
Increase Single Sword damage by 60% | Increase Single Sword damage by just 10% | |
Increase Double Sword damage by 60% | It does not increase the damage at all | |
Increase Long Staff damage by 60% | Increase Long Staff damage by just 10% | |
Increase Quarterstaff damage by 60% | Increase Quarterstaff damage by just 10% | |
Increase Single Blade damage by 60% | Increase Single Blade damage by just 10% | |
Increase Double Blade damage by 60% | It does not increase the damage at all | |
Increase Twin Spike damage by 60% | Increase Twin Spike damage by just 10% | |
Increase Dagger damage by 60% | Increase Dagger damage by just 10% | |
Increase Qimen damage by 60% | It does not increase the damage at all | |
External Critical Rate +30% | As expected | |
Internal Critical Rate +30% | As expected | |
External Critical Damage +30% | As expected | |
Internal Critical Damage +30% | As expected | |
Sacrifice 5% of your max HP to gain a temporary 30% damage boost | As expected | |
Reduce Stamina by 50%, gain +50% damage boost | As expected | |
Chance to heal 30% of your max HP when taking damage while having over 50 rage | As expected | |
Bleed yourself down to 10% max HP by 4% HP per second, while enemies around you bleed to death by 5% HP per second (boss excluded). | As expected, but also gives 5% Internal Critical Rate. Also, Tai Chi Bubble does not heal you from the bleeding. | |
When health is below 30%, damage dealt is increased by 50%. | As expected, but also gives 5% Internal Critical Rate | |
When health is below 30%, there is a 20% chance to completely dodge all damage for 20 seconds. | As expected, but also gives a passive 50% damage boost | |
When health is below 30%, deal an additional 30% physical damage with each attack. | As expected, but also gives a passive 50% damage boost | |
When health is below 30%, critical strike chance increases by 30%, and critical damage increases by 30%. | As expected | |
When health is below 30%, each critical strike will restore 30 points of rage and 30 points of lightness value. | As expected | |
When health is below 30%, movement speed is increased by 30% and evasion is increased by 30%. | As expected | |
When health is below 30%, a healing ban is triggered after being hit, and health cannot be restored after the ban. | As expected | |
Every 60 seconds, a 15-second shield is formed, which absorbs 80% of damage. | As expected | |
When hit, there is a 30% chance to form a 5-second damage reduction shield. | As expected | |
60% chance to add the "Insight" status when attacking, each layer of Insight reduces evasion by 5%, stackable up to 10 layers. (Probability is halved when targeting boss monsters) | As expected | |
When attacking a target with the Insight status, deal an additional 50% damage | As expected | |
When attacking, confirm the target's "Insight" state. If the state exceeds 1 layer, there is a 30% chance to remove 1 layer of the "Insight" state and cause 30% health loss (damage to boss-type monsters is halved). | As expected | |
When the target has the "Insight" state, each attack adds a layer of poison state, causing a small amount of damage to the surrounding area every second. | As expected | |
When attacking a target, if the target has more than 10 stacks of the "Poison Attack · Poison Damage" status, the status will be detonated, causing a 30% loss of health to the target and surrounding targets. (Damage to boss monsters is reduced by half) | As expected | |
Reduces self damage by 10%, and all damage becomes splash damage. | Reduces damage dealt by you, by 10%, and all damage becomes splash damage. |
5. Illustrations & Extra skills
As you progress through this game mode, you will unlock "illustrations" (by saving maids and killing the final boss). Unlocking certain illustrations, will unlock extra skills. Although, at that point you'll be powerful enough to deal with mobs, so the usefulness of these skills are questionable.
You can also buy illustrations you miss, with illustration points. You earn these by collecting illustrations you already own. You don't really have control over what you collect though, so it's all based on chance.
Check the in-game interface to see what illustrations are needed to unlock which skill.
Skill | Effect |
|---|---|
Stealth for 20 seconds | |
Fully restore HP and MP | |
Oneshot everything within 20 meters. Bosses drop their HP by half instead | |
20 seconds stun smoke bomb | |
Push mobs away within 20 meters for 20 seconds | |
Pull mobs within 20 meters and damage them |
6. Tips & Tricks
Try to reach floor 15 as soon as possible for the maximum amount of pills rewarded.
You can eat buffs inside. Definitely make use of them.
If you have trouble surviving, you can bring an HP regeneration arena pill. It should last long enough for a full run.
At higher floors, you can cheese the runs by debuffing mobs and bosses with HP regen reduce. For some reason, this reduces their maximum HP, making it very easy to kill them. Think of debuffs such as battlefield weapons, bloody sabre inner, or blood blade clan inner.
Yuanyang Twin Blades is arguably the best skillset for this game mode, because of the pulls, saving time. Get gold battlefield twin sabres for the above exploit, and it's like hot knife through butter.
The ranking doesn't do anything except give bragging rights. You "finish" this game mode at floor 50, once you get the final achievement.
If you really don't care for this game mode, then you can at least use it to quickly teleport out of Eastern Seas, as you will get your regular teleport points back once inside. Doing this does not reset your progress.
Once you unlock the talent of regenerating +20 lightness/second, a player with Hundred Transformations could enter the instance lobby to quickly stack up. This would only work for street fights, as you can't be in any event to enter this game mode.
7. Summary
Jinling Night Exploration is a new solo PvE mode where you climb endless floors and earn cultivation perfusion pills. You don’t need VIP to play.
You start getting cultivation perfusion rewards at floor 5. From floor 15 on, you get 35 pills per week. You have to finish one round, to get rewards the next week.
Dying resets your progress.
You also earn Talent Points and Illustrations to unlock buffs and skills that help in future runs.
All weapon buffs are bugged, but general buffs (like crit chance) work well. Some work more well than intended.
It is an excellent way to boost cultivation each week.